showerpan.net

(formerly Lifetime showerpans)

License #1003350 ● Bonded ● Insured
760 724 1352 ● San Diego County

Email: showerpan or d at showerpan dot net (use phone for scheduling NOT email)


CERAMIC TILE INSTITUTE OF AMERICA Field Report SUBJECT: WATERPROOF MEMBRANES FOR SHOWER FLOORS

DRAINS set too high are our #1 problem. It may seem like a small problem to you but its a big problem for us. I always tell my clients its like putting a head gasket on a car EXCEPT if a head gasket fails the cost to replace it is ONLY $700 or so.

Typical incorrectly set drain just below - click to how to correctly set a drain on wood or just scroll down

Setting a drain on concrete is a no brainer. Set it slightly below (1/8 to 1/4") the slab level. Your plumber may have to knock a little concrete off an edge to center the drain. It is WAY easier to set a 4" drain a little low than it is for us to raise a 4' x 6' shower floor. REMEMBER to fill the trap. There should be 3" of dry, smooth concrete at the top.


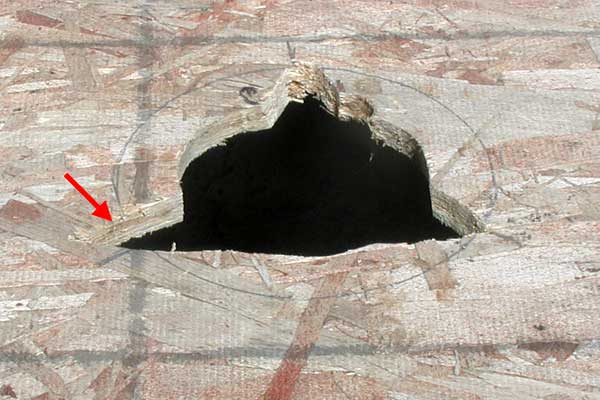
Typical incorretly cut drain hole.

How to do it right.

Note sloppy notch hole for bolt receptical.

Many times this type of set up will cause an unlevel drain. We try our best to fix unlevel drains but many times it is beyond our control.

Its really not our job to fix plumbing mistakes.
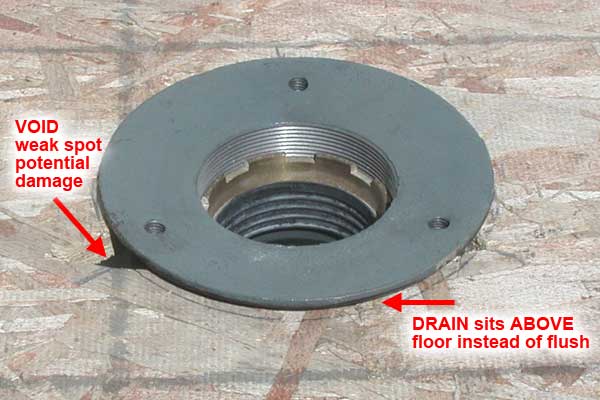
When notches for bolt receptical extends past edge of drain, the showerpan can be easily punctured. We cover holes with sheet metal but its not as good as solid wood.

Note drain flange sits above floor - rather than flush with floor. If we build this up with tar it could go through the floor into the room below.
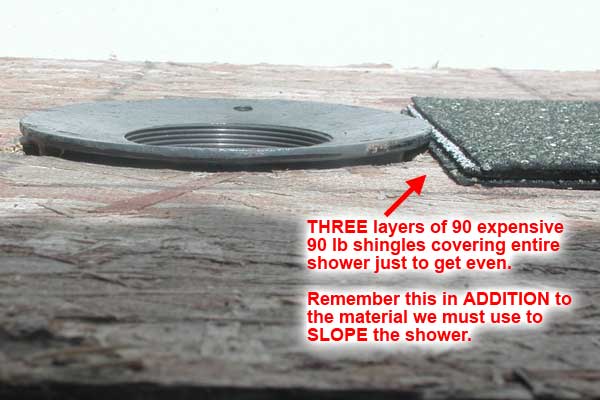
Its actually easier to do it right.

When the drain flange sits above the floor we have to raise the ENTIRE shower floor. Time and material costs can be extensive.

We MAY have to charge you extra for this work and material.

ESPECIALLY on a large shower.
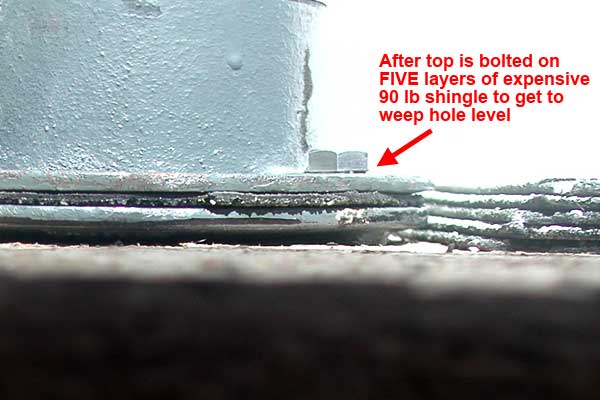
Its actually easier to do it right.

By the time we build up our material to compensate for the high drain AND to raise the level of the pan above the WEEP HOLES our time and material costs can be substantial.

Its actually easier to do it right.
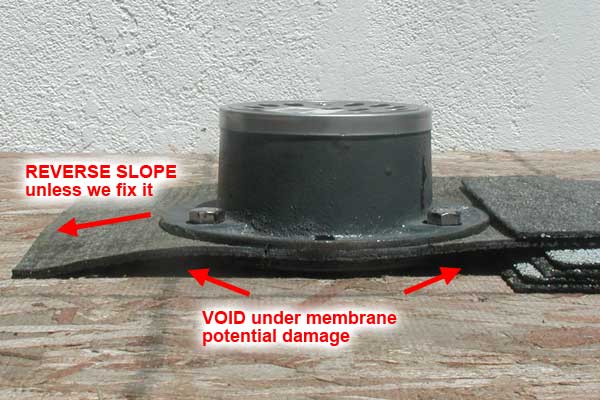


In addition to extra material costs, high drains create potential voids where the drain flange meets the showerpan membrane. Low spots around the drain can also be a problem. We can cope with these problems but again it takes extra time and material... for no good reason since:
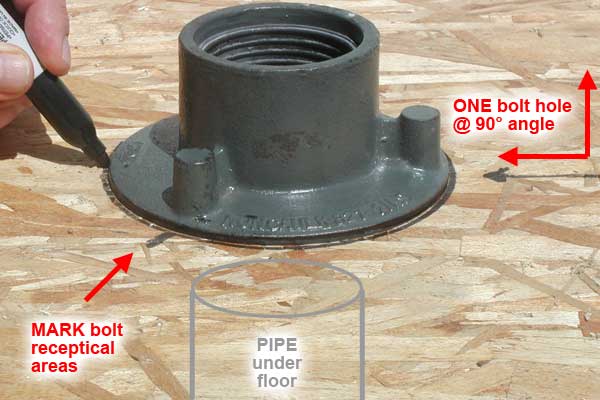
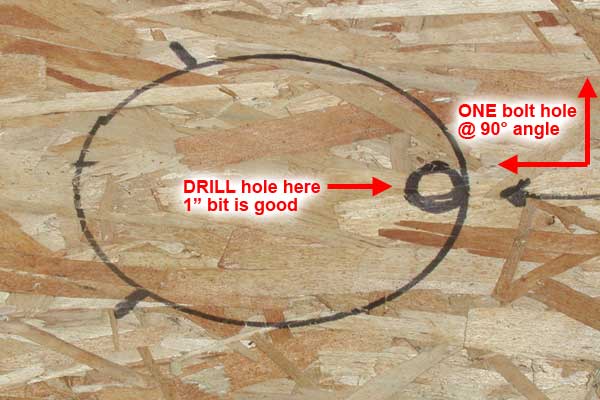
Its actually easier to do it right.


HOW TO SET A DRAIN CORRECTLY

Flip BOTTOM of drain over and center it above your drain pipe. Draw a circle around the edge.

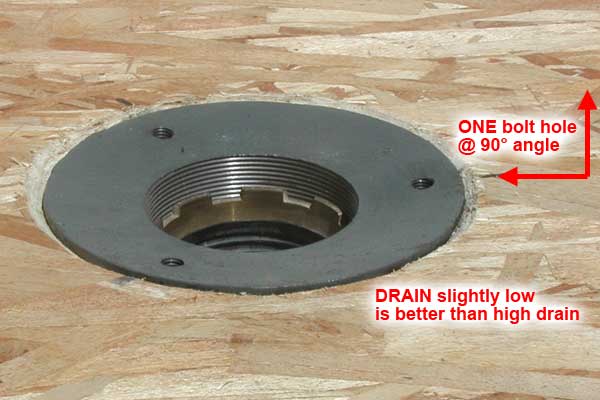
Make sure you have one bolt receptical at a 90° angle from the wall so the screws on the grill will line up and look neat. *CAUTION: THERE IS ONE DRAIN THAT REQUIRES SOMETHING LIKE A 37.5 DEGREE NOTCH. It also has a flat bottom which can be place flat on the surface of wood floors. Its black with keyholes for the bolts.

Put marks where the bolt recepticals will need to fit.

RETURN TO TOP

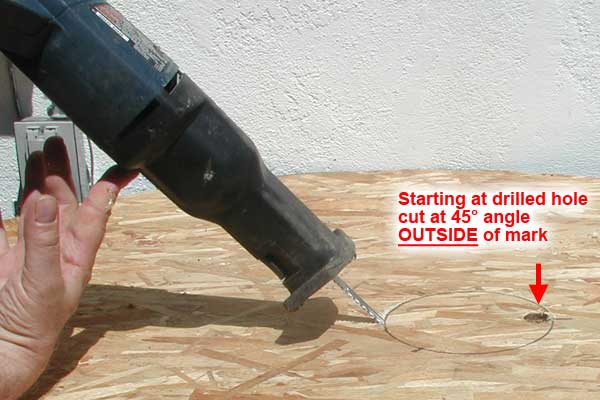
Drill a one inch hole just inside the circle. If you don't have a 1" drill use something almost as big. You may have to angle the hole at 45° towards the center.

RETURN TO TOP

Using your sawsall CAREFULLY cut just outside the drain outline.

A jigsaw with a sharp blade will do this better but its not too hard to use a sawsall if you are careful.

RETURN TO TOP

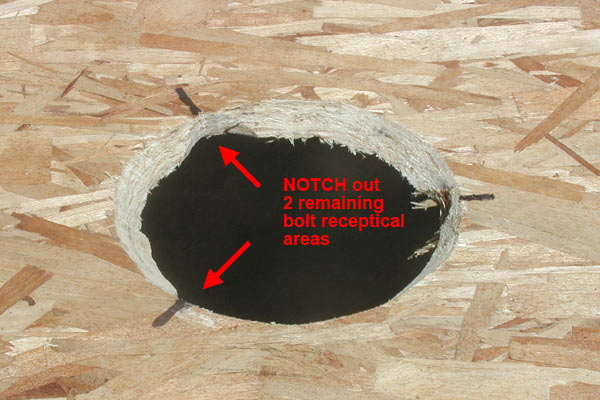
Notch the other two holes.

EASY.

Be careful to avoid cutting too far. If you do - its no big thing, we'll put some sheet metal over the boo-boo.

RETURN TO TOP

Drain will now fit snugly into the beveled hole. It doesn't have to be perfect. It will be way better than the incorrect method at the top of this page.

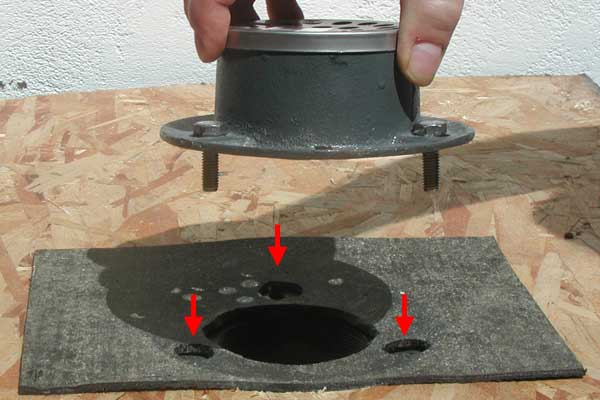
Always replace top and bolts to keep drain holes free of debris.

.

RETURN TO TOP

So you know:

We put our hot tar membrane between the top and bottom and then we bolt the top down so it CAN'T LEAK. Just like the head on an engine and just as important.

Drains are the most likely source of leaks for beginners and inexperienced showepanners.

RETURN TO TOP

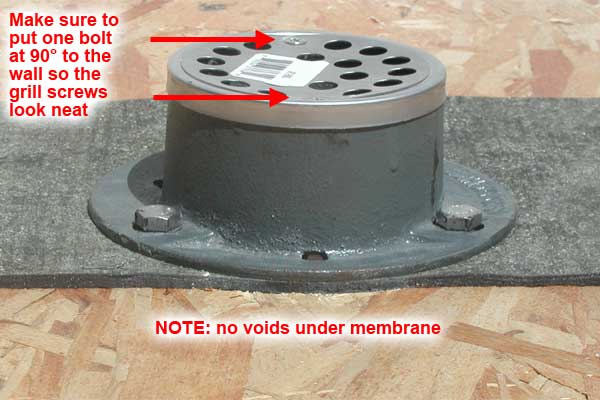
Finished drain.

NO VOIDS under the showerpan at the lip of the flange. We try to make sure to set the top so the grill screws at the top are at a 90° angle to the walls.

If you forget to get one of the bolt holes at a 90° angle we can't get this right. Its a small thing but customers do notice it.

RETURN TO TOP